Monday, 22 April 2013

Pompom/washi tape deer...

Washi tape border/frame


My latest deer project, made from paper mache....decorated with a pom pom garland to make it fun.

This project is the first time I have used paper mache, again I got the idea from different sites on Pinterest where I am finding endless inspiration and ideas. Was pretty fiddly but I did enjoy the process and besides the girls got to join in and make little projects of their own. Super messy! so we pretty much did it all outside (to save my sanity really hehee).

I used wire for the inside for strength, but without it being to heavy. Was pretty easy to form into shape.

starting out, shaping the wire head and attaching ears.
Paper mache process, with a hook attached at the back ready for hanging.

I did a few layers of the paper, just so it was strong and firm enough, letting it dry well between each layer. The face was the hardest to get into shape, thats for sure. 
Once I attached the antlers (all wire inside as well) I found they dropped abit from the weight of the paper once I started to mold them...my thoughtful husband advised me to try again and so with a little frustration on my part I cut them off to re-attach them in a higher position. I am glad I did in the end, a little extra time/work but worth it. Then two coats of white acrylic paint to finish, nice and neutral.


after cutting off the antlers, wire and all, poor little deer...


Our finished results. The girls "Tom and Jerry". Once Ash realised Hayley was making Tom (orange one of course) she decided to change her bear into Jerry...I think they are pretty cute and they certainly had fun! 
And my pom pom garland can of course be changed or removed (Chris prefers it without them) depending on the colour scheme of where we decide to hang it...still deciding on its home, the girls have put in a request for their room. 

I am thinking of doing a washi tape "frame" around it too, (bright, colourful or patterned tape used for decorating, etc)....when we have found the perfect hanging spot I can decide on the colours to use...good thing about the washi tape trend is that it can easily be removed/repositioned etc. Thats the thing with trends, I cant justify spending alot of money on any product that may not go the distance, thats another reason little projects like this appeal too. 

If you are interested the paper mache recipe I used is below....
Till next time! 
Deahne xo

Paper mache recipe- 1 part flour to 2 parts water 
Stir well in a large bowl untill no lumps, runny NOT thick like paste).
I added a little salt to prevent mold and cinnamon to smell nicer.
The mixture lasts for a couple days in the fridge, just stir again if it seperates. 
Then torn up strips of newspaper, different widths and lengths. Dip in "glue mixture" and mache away!

Friday, 12 April 2013

the little things....


Brocco bear.

Have been sorting through alot of photos lately and found a few worth sharing, I dont know about you but I always try to really appreciate all the little things in life. The kiddies are growing up so fast....(Hayley will be 10 this month!). These are a few of those little things that I wont always have the pleasure of seeing in our home....little things we take for granted.

Example, my little Beau sitting at the front door looking out, but not venturing out....yet (thankfully) because he doesnt like the feel of the doormat on his hands (and hasnt figured out a different way past hehehe, he isnt walking yet, but it wont be long and his "babyhood" will change to "toddler". sigh.

And the girls wont always be into dolls and fairies etc....(so glad they still believe in Santa, the Easter bunny & toothfairy too)

Wish they wouldnt grow up so fast....hope you like these "little" pics.

Deahne xo.


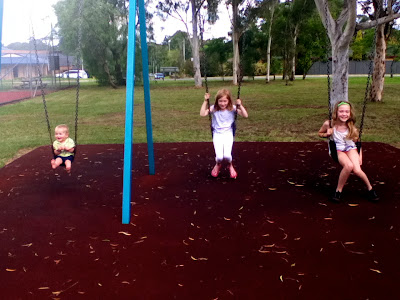
A play at the park.


Beau has his two favourite sleeping friends (above) Foxy and Bunny, they always get well cuddled....


My little Ash.


Some of Beaus faves...(including a little felt bear I made originally for Hayley when she was a bub.)
Could have added 100 more! so many beautiful childrens "things" and moments/memories in our home, this month we will have been here for 8 years! always nice to reflect....bye for now....

Friday, 5 April 2013

Paintings x 3

I have been soooooo slack of late!! (I am putting it down to pure laziness, time to pull my finger out and get motivated again to keep creating).....My latest project I have been working on 3 separate paintings that I knew I wanted to display together.

 My inspiration behind these pieces is based alot on my love of fashion, in particular bold prints, Baroque, bright colour and clashing. I think separately they are ok, but together they make each other stand out more. Hopefully you agree....the lighting isnt the best for the photos (lovely dark rainy day) but the colours still seem bright and happy.


I have placed them in our entryway in the loungeroom, so the colours all fit in with the lounge and other furnishings too.

Here they are separately....
Simple grey

Neon floral

Baroque
Below is a photo from further back to see how it fits in with the lounge room current colour scheme.
The fam gives me the thumbs up, so the paintings can stay....must always meet approval from my very honest art critics. 
Would have been very simple to just cover these canvas's with some great printed fabrics, quick, effective and easy too! but this way I got to paint again and make them even more personal, the enjoyment is in painting. Till next time! (So excited its now Autumn too, my favourite season! the weather is getting cooler and I cant wait for the leaves to start changing and do some Autumn inspired creations too!) Watch this space....bye for now x.


PS. Below, a closer up shot of my Neon Floral painting.....bye again, Deahne.